- Tech, OC'ing, SEO and more
- Hits: 58413
Article Index
Setting up your NDI Feed.
You will capture from your gaming rig, voice chat will happen from the Gaming Rig so you will need to setup OBS or Streamlabs to your taste. All OBS or Streamlabs will do it generate a feed and send it to through your LAN to your Capture Rig. Besides your own preferred setup, you will need to set up the NDI plugin. Any extra you might have like overlays, widgets, and alerts can be done from either rig, but I would suggest using the Capture rig so you never have to alt-tab and use the mice/keyboard or even streaming deck(s) from your capture rig. It allows you to work on your stream without the viewer ever knowing as well as any smooth recording session as a result.
In OBS go to Tools then select NDI Output Settings, tick both boxes on Main Output and Preview Output and give them a name.
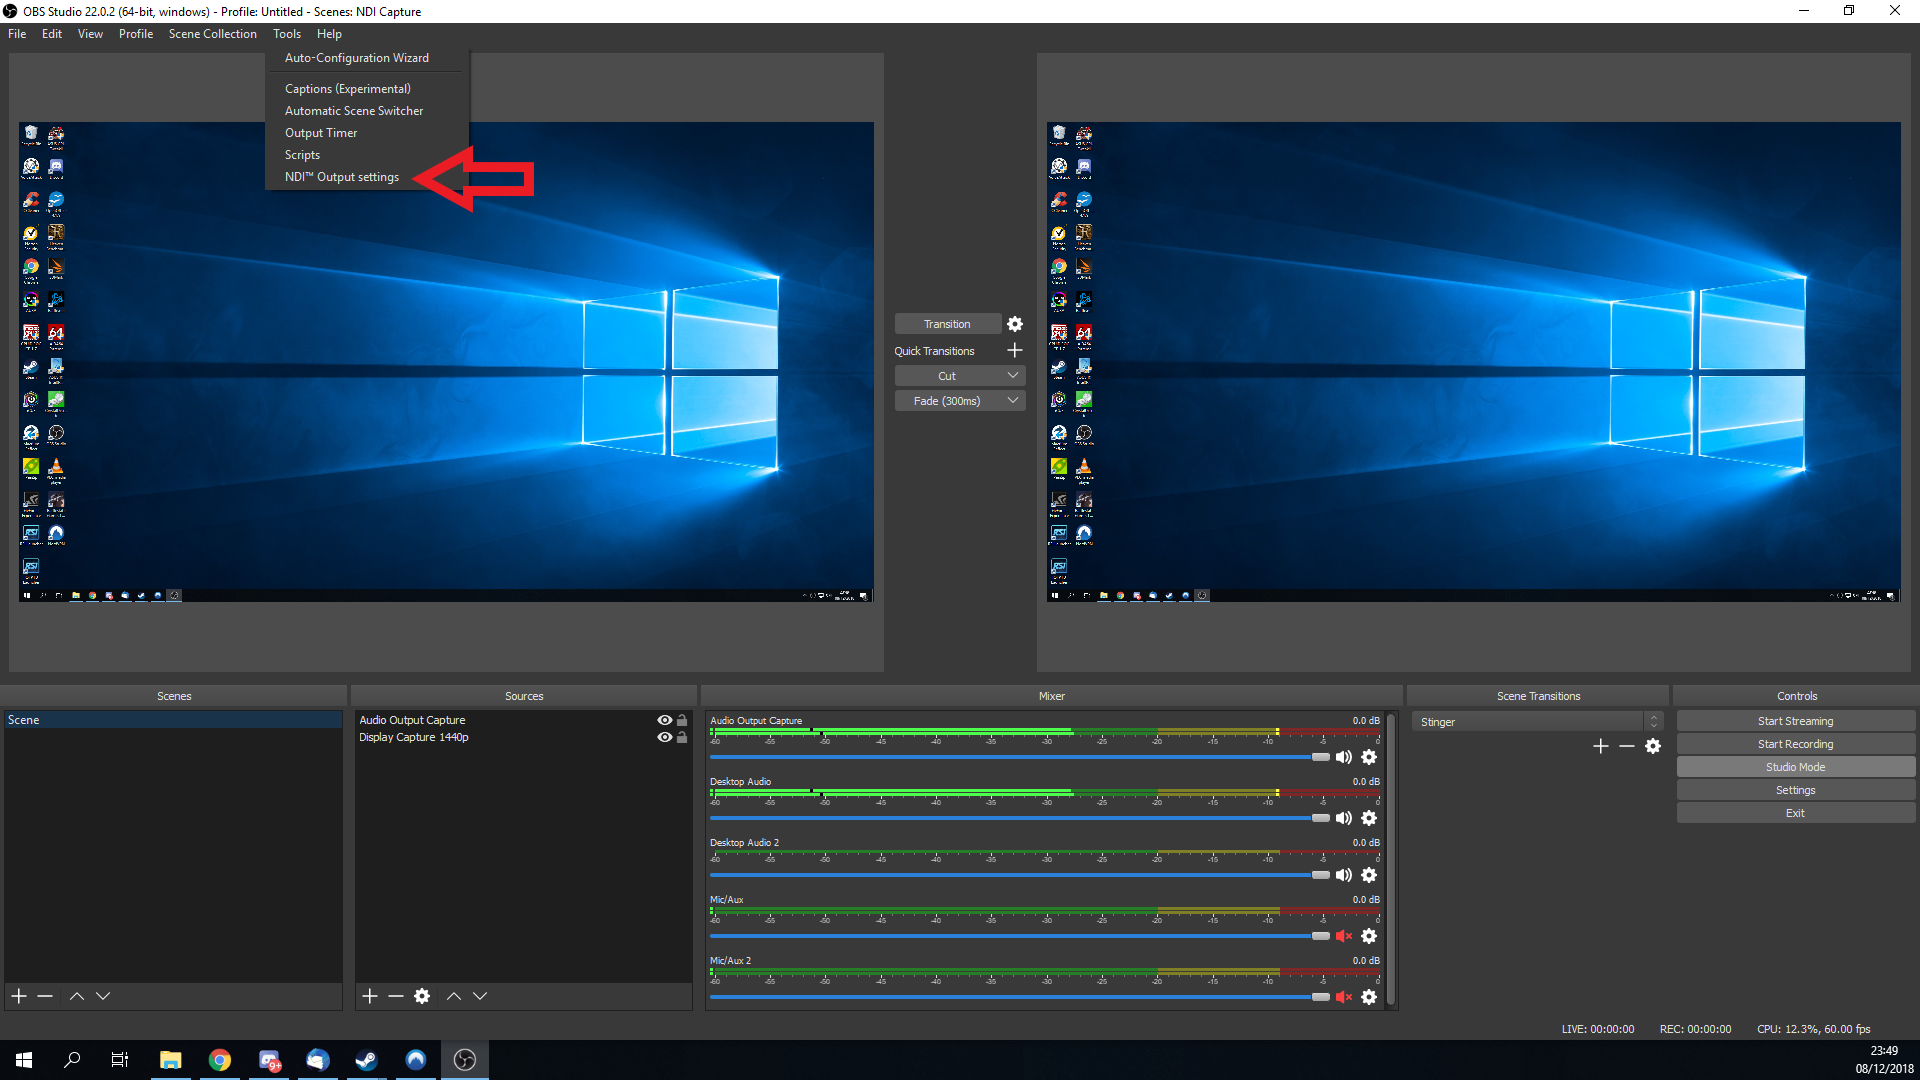
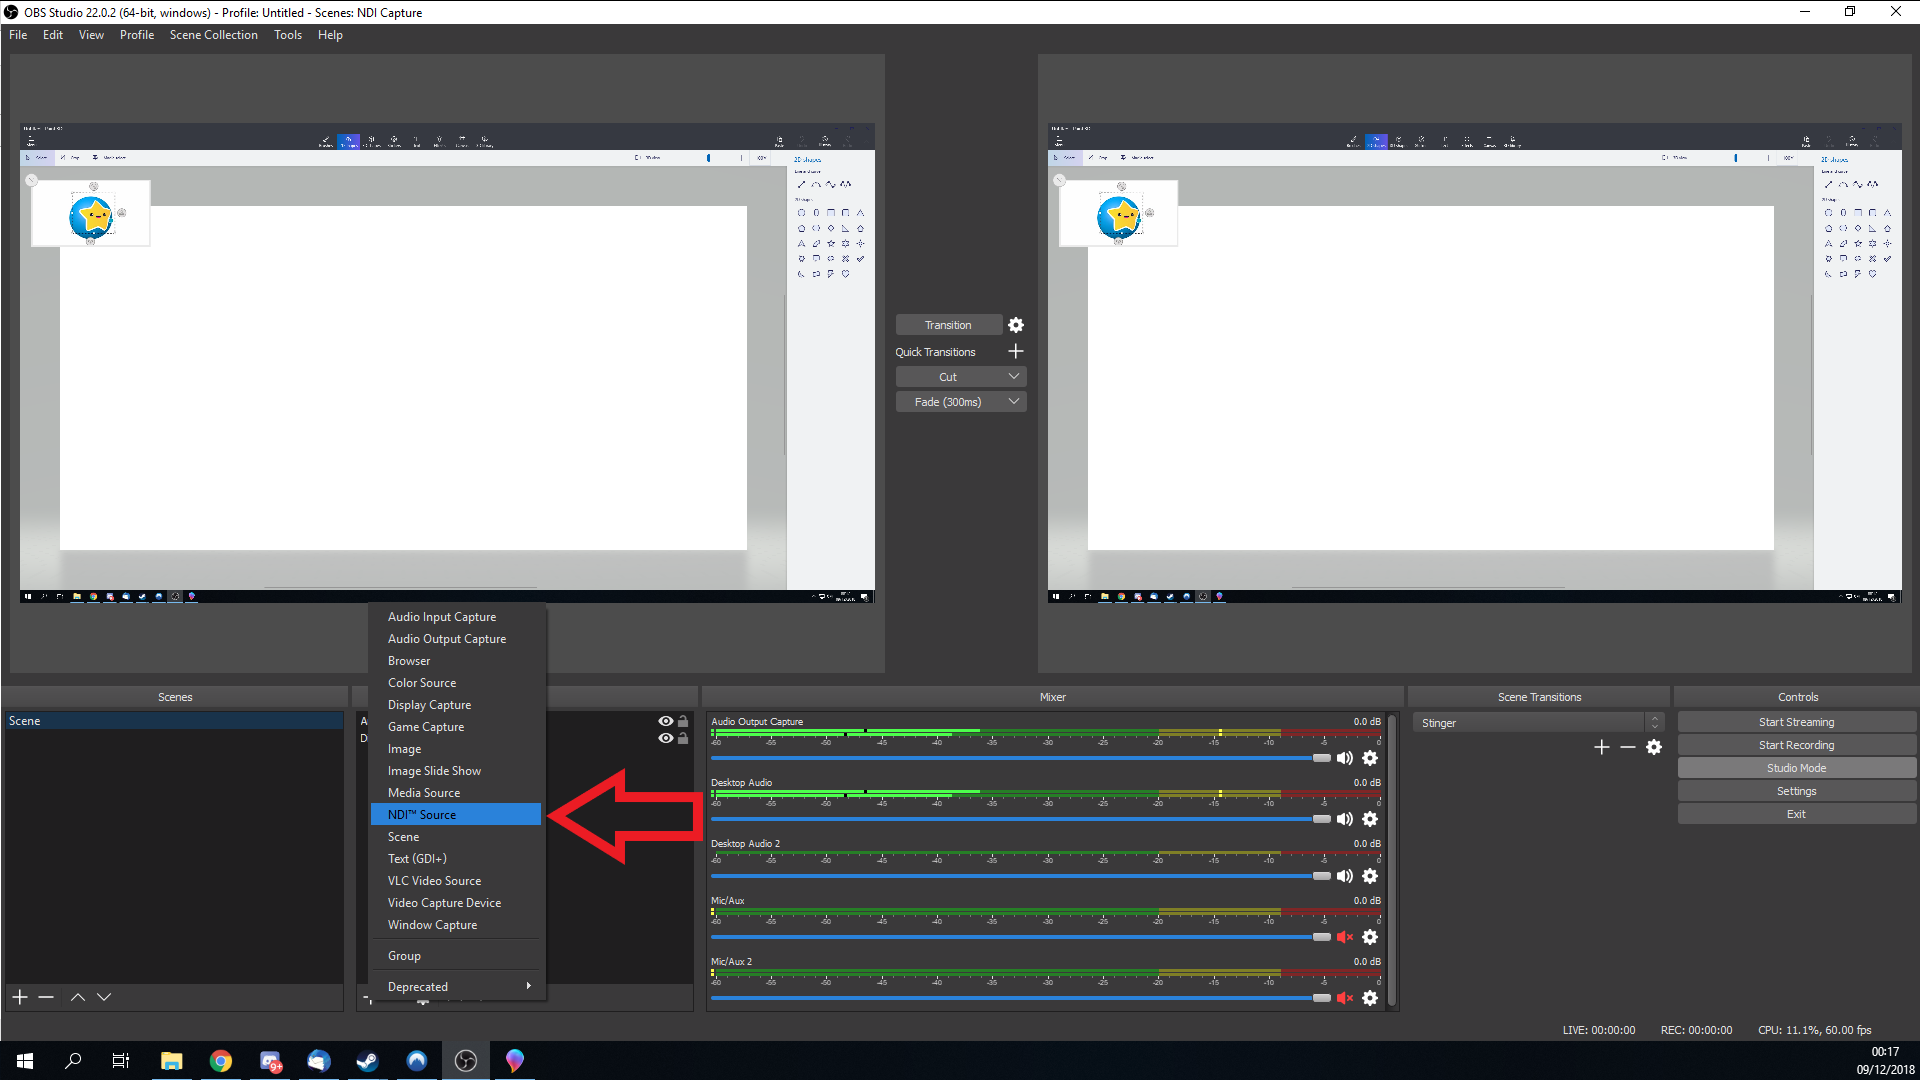
You will notice that while the NDI plugin is active you can not modify the output settings so ensure you have those set or go back to the NDI plugin and untick the boxed to modify your output settings. I will have some more tips for the quality of your capture feed below but first, let's finish the basics. The next step will be capturing the feed using NDI plugin on your Capture Rig, In your preferred scene to stream or capture add a source and select NDI Source, Select Create new and name this source to your liking and click OK.
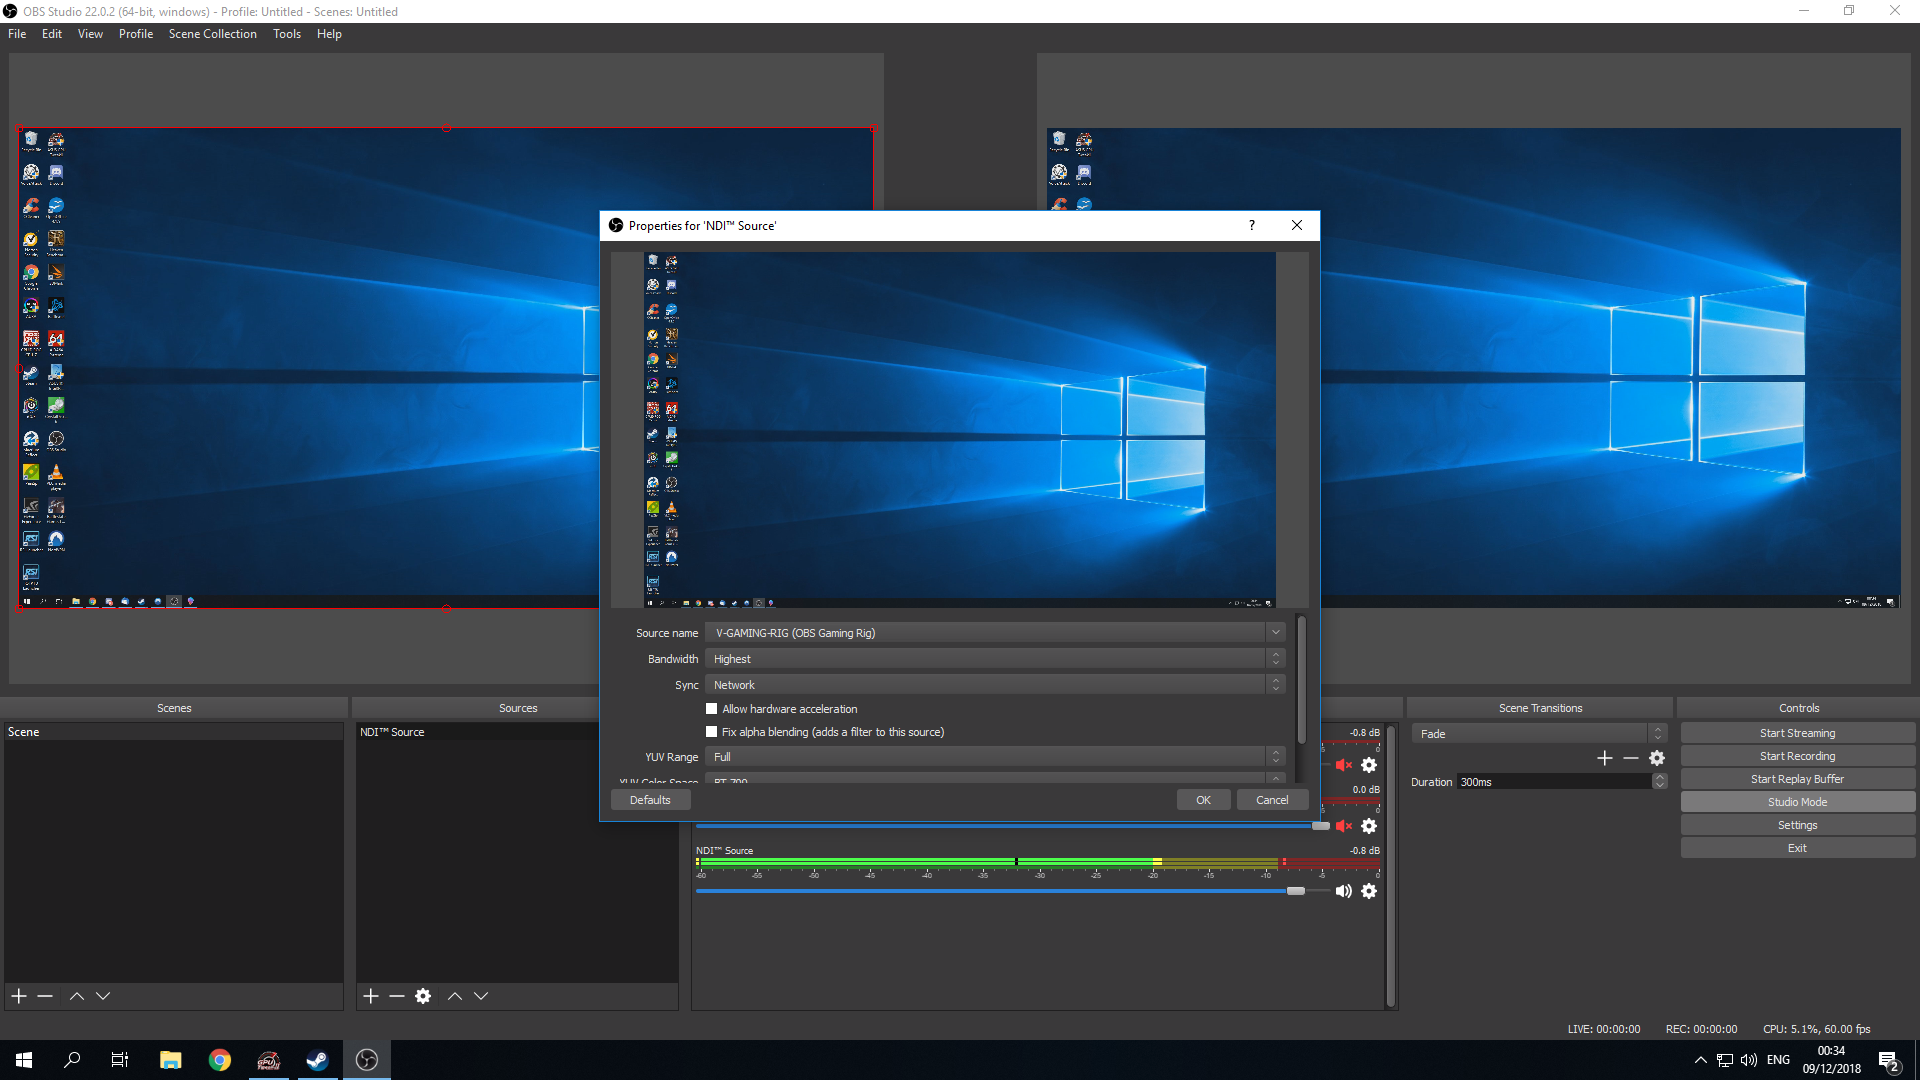
You will be presented with an options screen, Under Source name select the feed that you named in OBS/Streamlabs NDI plugin setup. Ensure you use the highest possible bandwidth for the best results unless you intend to use lower settings. Also, make sure the YUV Range is set to Full and the YUV Color Space is set to BT.709. And then click OK. You will notice as soon as you select a feed it will start displaying your desktop this means it is now receiving and you are ready to start Streaming and or Recording.
Now you will have to select your stream service and enter your stream key and select a Recording Path if you wish to record as well. Furthermore, you will have the option to record as you stream or just make a recording for you to make content. Always use the X264 encoder over hardware, the CPU encoding is more powerful and yields better quality results. Important here as well as to ensure you select the right bitrate with the right resolution for your recording or stream. In my case using my hardware I Record and Stream 1080p @ 60 FPS with a streaming bitrate of 6000 and a recording bitrate of 12000.
These settings will vary with hardware as well as any limits a streaming service might impose on your feed, but recording wise you can do whatever you want just make sure there is no lag and you have a stable stream that does not drop frames giving the best viewing experience.


