- Tech, OC'ing, SEO and more
- Hits: 153717
User Rating: 3 / 5


Article Index
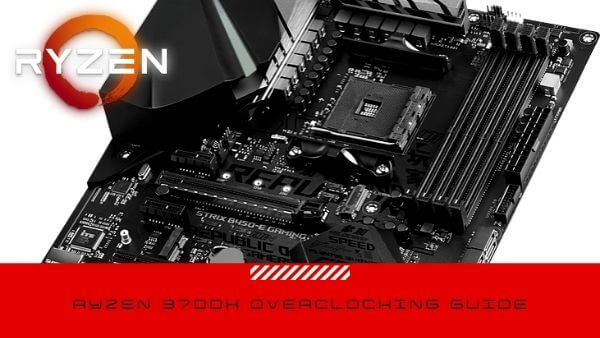
AMD Ryzen 7 3700X overclocking guide.
This is an easy to use and comprehensive overclocking guide for the AMD Ryzen 7 3700X with a wide range of illustrations. Both the manual overclocking and the AMD PBO 2.0 feature is covered in this guide for the AMD Ryzen 7 3700X.
Introduction and components.
This setup is intended for my home server below are some of the parts I mainly use for overclocking. The difference is a 2666C16 64Gb kit and no GPU when this is moved over into the server case. For the server, the tweaked PBO 2.0 profile described below will be used as it will be the most power-efficient while retaining most of it boost potential. Of the bat, I will say overclocking the Ryzen 3000 series does not see an awful lot of gains unless you also want to overclock the memory with the CPU. In the case of manually overclocking a DDR4 overclocking guide located here: Overclocking guide for DDR4 RAM to unlock the full potential of the 3700X. For most users using the PBO 2.0 features will be the fast and easy route to take.
- CPU: AMD Ryzen 7 3700X.
- Cooler: Gelid Phantom Black.
- Motherboard: ASUS B450-F Gaming.
- RAM: G.Skill TridentZ 16GB @ 3600 15-15-15-32.
- GPU: MSI GTX 770.
- Corsair RM 850 Gold.
Getting Started with overclocking the AMD Ryzen 7 3700X
Make sure you have the latest chipset drivers and other drivers for your current setup. Using outdated drivers may cause instabilities not related to your overclocking. In this guide, a preset 3600C15 XMP profile was used @ 1.25v of 16GB. Consider running a synthetic benchmark with stock settings to measure your gains as well as in this case, ensuring the stock CPU and memory that is running XMP is fully stable. When using a complete new DDR4 kit, this is not advised, and it is recommended that you overclock your CPU first and then overclock the DDR4 RAM kit of your choosing. As well as if you intend to do any gaming have a baseline of FPS so you can see the increase in performance.
You also want to download the following programs for stress testing your overclock. These are a vital tool for stress testing and monitoring if you already have tools you can use those but these programs I highly recommend and were used while writing this overclocking guide and many other overclocking guides on hisevilness.com.
- HWiNFO64: HWiNFO64 monitoring tool download section
- Prime 95: Prime 95 stress test download section
- Linpack Xtreme: Linpack Xtreme stress test download section

BIOS Settings.
Zen 2 offers greater stability then the previous Zen architectures and can be used running a stock XMP profile. Do make sure that the DDR4 kit is listed on the QVL list of your respected motherboard. So you can select the XMP profile and make sure the right XMP profile is selected. For this motherboard, the listed XMP profile, in general, is 3466Mhz. However, the XMP profile of 3600C16 can be selected and works just fine. If your DDR4 kit is not listed on the QVL list, then it would be wise to turn on the XMP profile and do a Prime95 or Linpack Xtreme stress test first to make sure the XMP profile is stable.

Ryzen 3700X and Precision Boost Overdrive 2.0.
The AMD 3000 series works really well with PBO, and it can be the safest and fastest way to overlock any 3000 series CPU. PBO 2.0 offers much finer control over the auto-overclock feature.
There some settings in the BIOS that can be adjusted to use AMD's Precision Boost Overdrive 2.0 to gain the best results some tweaks are needed for a longer boost duration and overriding some limitation from within the BIOS. Important with PBO 2.0 is how the Precision Boost Overdrive Scalar works with the PPT, TDC and EDC. To run a Scalar 10, you will need to tweak the PPT, TDC and EDC settings. If opting for a lower Scalar PPT, TDC and EDC can be left on Auto or maxed out.
- Precision Boost Overdrive: Set to manual to adjust settings.
- PPT Limit: The maximum for your motherboard by simple entering 99999 it will autocorrect to the maximum value for your particular motherboard.
Manual settings for PPT: set a value of 100 ~ 125. - TDC Limit: The maximum for your motherboard by simple entering 99999 it will autocorrect to the maximum value for your particular motherboard.
Manual settings for TDC: set a value of 60 ~75. - EDC Limit: The maximum for your motherboard by simple entering 99999 it will autocorrect to the maximum value for your particular motherboard.
Manual settings for EDC: set a value of 80 ~ 115. - Precision Boost Overdrive Scalar: Increase the maximum boost voltage and time when using that particular boost value. For this motherboard Scalar, 10 was used with manually tweaked settings.
- Custom Precision Boost Overdrive Scalar: Scalar multiplier use a value of 7 or less.
The Scalar value of 10 to achieve higher Mhz, but this must be reign in with custom PPT, TDC and, EDC values. Use a lower or auto Scalar if having PPT, TDC and, EDC set to Auto. - Max CPU Boost Clock Override: Maximum value for Core Boost use the highest setting.
- Platform Thermal Throttle Limit: Set to Manual.
- Platform Thermal Throttle Limit*: Set to thermal value in Celcius, use 80 ~ 90.
The image below is an example profile of the 3700X running a base PBO 2.0 profile reaching 4.35 GHz max all cores and under sustained load with Prime95 Small FFT's 4.20 GHz all cores. And a max single core of 4.425 GHz single-core with Prime95 Small FFT's.

A feature on the ASUS motherboard is the Fmax Enhancer by The Stilt this helps single-core performance. It can be enabled in the normal PBO menu as highlighted below.

With some further tweaks, some more gains could be made, but those gains were minimal. 4.35 GHz max all-core with a sustained all core max of 4.3 GHz. And a max of 4.475 GHz in single-core. This also might be because of the limitation of the VRM on a B450 motherboard so X470 or X570 motherboard results should be far better. Another option here is to tweak the VRM settings as would normally apply when manually overclocking. The Digi+ VRM settings below covers that more in-depth to squeeze just a bit more performance out of your AMD 3700X.

DIGI+ VRM Settings Ryzen 3700X.
In preparation for the overclocking of the AMD 3700X, some settings for the VRM need to be adjusted for stable overclocking. This portion also covers some settings for overclocking memory regarding the SoC portion of the VRM. When overclocking with a different brand of a motherboard, the LLC levels might be different, but in short, you want to have as little Vdroop as possible. Other brands might reverse the numbering for LLC where 1 has the least Vdroop and 6 the most etc.
- VDDCR CPU Load Line Calibration set to LLC4 or High.
- VDDCR CPU Current Capability set to 120% ~ 130%.
- VDDCR CPU Switching Frequency set to 300 ~ 350 range or set to high/extreme.
- VDDCR CPU Power Duty Control set to extreme.
- VDDCR CPU Power Phase Control set to extreme.
- VDDCR SoC Load Line Calibration regular will do unless you look to memory OC above 1:1 FCLK/MCLK with 1.20v ~ 1.25v on the SoC voltage.
- VDDCR SoC Current Capability set to high/extreme.
- VDDCR SoC Switching Frequency set to 300 ~ 350 or set high/extreme when going over 1:1 FCLK/MCLK with 1.20v ~ 1.25v on SoC voltage.
- VDDCR SoC Power Phase Control set to 120% ~ 130%.

AMD CBS & Precision Boost Overdrive.
Furthermore, a couple of settings need to be turned off for manually overclocking the AMD 3700X. In this particular BIOS, these settings are presented twice in various menu's. If left on these might introduce instability in the manual overclock.
- Core Performance Boost: Off
- Global C-State: Off
- Precision Boost Overdrive: Off
Under AMD CBS turn off Core Performance Boost and Global C-State Control as shown in both images below, there are 2 menu's you will need to browse to in the particular B450 motherboard.


Then go to Precision Boost Overdrive and turn that off as shown in the images below, there are 2 settings menu for this portion as well.


Ryzen 3700X VDDCR Core Volts & CPU Core Ratio.
Now for the final part after a bit of preparation, and see how far the 3700X can manually overclock. Make sure not to exceed to voltage limited either set by AMD or the Overclocking community. For a save daily use, make sure never to exceed 1.35v on the CPU core. Running higher voltages can be done for quick benchmarks and record attempts.
- AMD Recommended Voltage: 1.250 to 1.300 volts.
- Community Recommended Voltage: 1.300 to 1.350 volts.
- Absolute max and not recommended: 1.400 to 1.500 volts.
In this part, you will work the with CPU Core Ratio as the multiplier and the CPU Core Voltage to enable the manual overclock to be stable at the set core ratio. In the section below is my voltage curve for the 3700X on this ASUS B450-F motherboard to give you an idea where you can start with applying a voltage and core ratio. For this guide, the starting voltage will be the recommended AMD voltage of 1.25v. You can either set the voltage manually or using the offset mode. However, stay within the max recommended voltage limits. SoC voltage is mostly for overclocking DDR4 and can be set manually to 1.1v ~ 1.15v, and with the AMD 3000 series, it has less impact on overclocking over previous generations.
Set the desired CPU Core Ratio as shown in the image below, in this case, 44.00 means, 44.00 multiplied by 100.00 base clock for a CPU all-core frequency of 4400 MHz.

Now scroll down and look for the voltage control, as shown in the image below. Here you want to enter a voltage that is close to your Core Ratio. In this case, a Core Ratio of 44.00 would take about 1.30v to stay stable. With a different Core Ratio, you would need a different CPU Core Voltage. You can use the Voltage Curver section below to get an idea what your Core Ratio would need in terms of CPU Core Voltage.

Now save the settings by pressing F10 and boot into windows, either your boot will fail; thus, the overclock is unstable or you will boot into windows. Now you will need to do a quick stability test to make sure this Care Ratio and CPU Core Voltage is stable. Open your monitoring software like HWiNFO64, and then open Prime 95 run Small FFT's or Smallest FFT's using all cores and all threads. Make sure your temperature stays below 90C. Run this for about 30 minutes and make sure one of the worker windows in Prime95 does not display an error. When that happens the 3700X close to stable so you would need CPU Core Voltage to have a stable CPU overclock. It is also possible the PC will shut down, reboot or BSOD. In that case, the 3700X is unstable, and the CPU would need a considerable more voltage to have a stable overclock.
In the case of reaching to maximum save daily voltage, you want to lower the Core Ratio over increasing the CPU Core Voltage. If you picked a lower Core Ratio, you could try to increase Core Ratio with the same CPU Core Voltage and do a quick stress test in Windows to make sure that it is stable. And then keep increasing the Core Ratio or CPU Core Voltage until you reach the max daily save voltage. This particular 3700X reached a manual overclock of 4.4 GHz with a CPU Core Voltage of 1.30v.
Stability Testing.
For a proper stability test, you will need to run some of the stress test listed below for a longer duration. These tests represent very high loads something you would not normally see but more likely see in production workloads like video rendering. If you would like to see a more game-related stress test, you can run Prime95 with Custom 8K FFT's. Linpack Xtreme is also a nice benchmark that put stress on the CPU and should be done for at least 10 runs when asked for your stress test parameters.
- Prime95: Complete a 2 hour Small FFTs or Custom 8K FFTs(synthetic gaming load)
- Linpack Xtreme: Complete at least 10 stress test runs with half of the total RAM capacity using all cores and threads.
Ryzen 3700X Voltage Curve.
This is the voltage curve for this AMD Ryzen 3700X, and it will be different per CPU. The main take away is that with the Ryzen 7 3700X the voltage wall is around 4.4 GHz. Important to note here again that more than 1.35 voltage is on the limit for Zen 2 daily use and more then 1.3v is not advised by AMD. And PBO 2.0 almost does a better job then manually overclocking with the AMD 3000 series.
3700X @ 4.1 GHz.
- 41.00 Core Ratio.
- VDDCR @ 1.087v.
- CPU LLC 4
- SOC LLC Auto.
- Validation with P95 Small FFT's and Custom 8K FFT's.
3700X @ 4.20 GHz.
- 42.00 Core Ratio.
- VDDCR @ 1.144v.
- CPU LLC 4
- SOC LLC Auto.
- Validation with P95 Small FFT's and Custom 8K FFT's.
3700X @ 4.30 GHz.
- 43.00 Core Ratio.
- VDDCR @ 1.225v.
- CPU LLC 4/High.
- SOC LLC Auto.
- Validation with P95 Small FFT's and Custom 8K FFT's.
3700X @ 4.40 GHz.
- 44.00 Core Ratio.
- VDDCR @ 1.300v
- CPU LLC 6/Extreme.
- SOC LLC Auto.
- Validation with P95 Small FFT's and Custom 8K FFT's.

- Paul "HisEvilness" Ripmeester